iOS动画之CATransition动画
今天主要用到的动画类是CALayer下的CATransition至于各种动画类中如何继承的在这也不做赘述,网上的资料是一抓一大把。好废话少说切入今天的正题。
一.封装动画方法
1.用CATransition实现动画的封装方法如下,每句代码是何意思,请看注释之。
 #pragma CATransition动画实现
 - (void) transitionWithType:(NSString *) type WithSubtype:(NSString *) subtype ForView : (UIView *) view
 {
     //创建CATransition对象
     CATransition *animation = [CATransition animation];

     //设置运动时间
     animation.duration = DURATION;

     //设置运动type
     animation.type = type;
     if (subtype != nil) {

         //设置子类
         animation.subtype = subtype;
     }

     //设置运动速度
     animation.timingFunction = UIViewAnimationOptionCurveEaseInOut;

     [view.layer addAnimation:animation forKey:@"animation"];
 }
代码说明:
CATransition常用的属性如下:
- duration:设置动画时间
- type:稍后下面会详细的介绍运动类型
- subtype:和type匹配使用,指定运动的方向,下面也会详细介绍
- timingFunction :
- 动画的运动轨迹,用于变化起点和终点之间的插值计算,形象点说它决定了动画运行的节奏,比如是均匀变化(相同时间变化量相同)还是先快后慢,先慢后快还是先慢再快再慢.
- 动画的开始与结束的快慢,有五个预置分别为(下同):
- kCAMediaTimingFunctionLinear 线性,即匀速
- kCAMediaTimingFunctionEaseIn 先慢后快
- kCAMediaTimingFunctionEaseOut 先快后慢
- kCAMediaTimingFunctionEaseInEaseOut 先慢后快再慢
- kCAMediaTimingFunctionDefault 实际效果是动画中间比较快.
2.用UIView的block回调实现动画的代码封装
 #pragma UIView实现动画
 - (void) animationWithView : (UIView *)view WithAnimationTransition : (UIViewAnimationTransition) transition
 {
     [UIView animateWithDuration:DURATION animations:^{
         [UIView setAnimationCurve:UIViewAnimationCurveEaseInOut];
         [UIView setAnimationTransition:transition forView:view cache:YES];
     }];
 }
3.改变View的背景图,便于切换时观察
 #pragma 给View添加背景图
 -(void)addBgImageWithImageName:(NSString *) imageName
 {
     self.view.backgroundColor = [UIColor colorWithPatternImage:[UIImage imageNamed:imageName]];
 }
二.调用上面的方法实现我们想要的动画
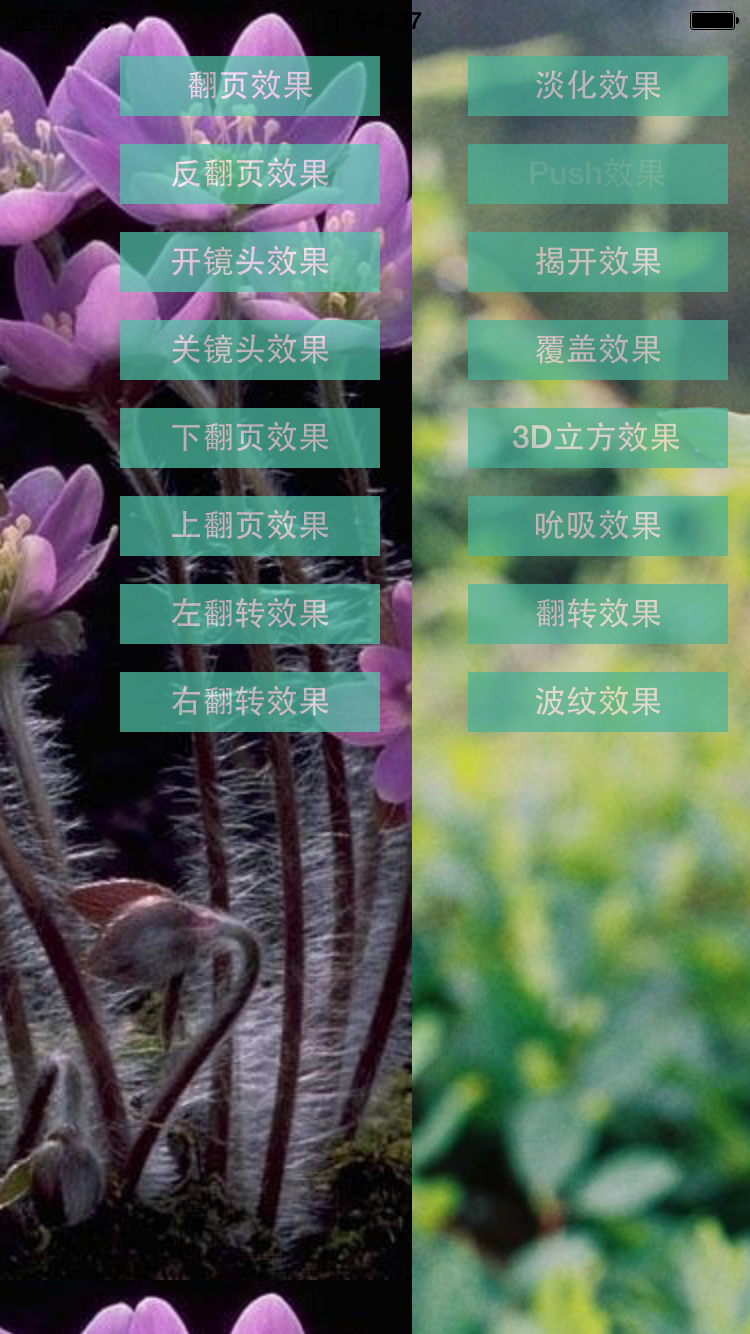
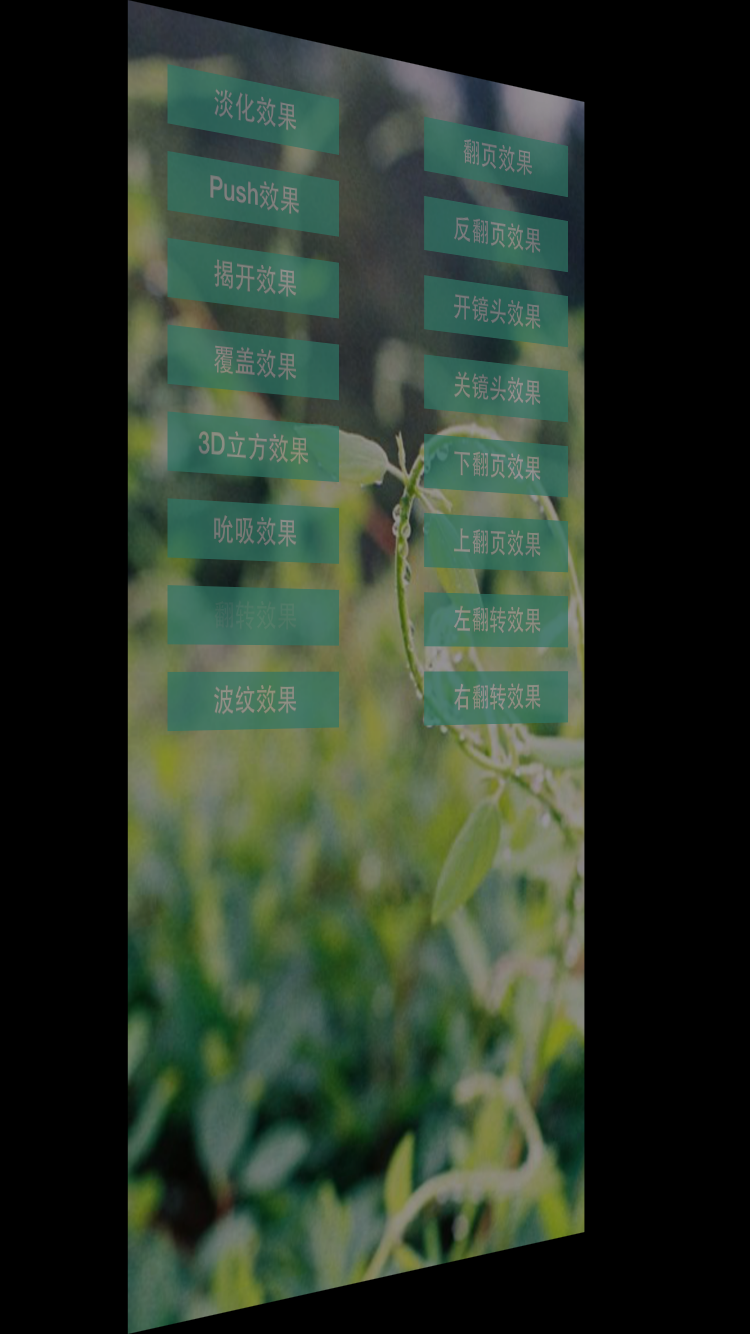
1.我们在View上添加多个Button,给不同的Button设置不同的Tag值,然后再ViewController中绑定同一个方法,点击不同的button实现不同的页面切换效果。storyBoard上的控件效果如下图所示:

2.下面我们就开始编写点击button要回调的方法
- 定义枚举来标示按钮所对应的动画类型,代码如下:
typedef enum : NSUInteger {
    Fade = 1,                   //淡入淡出
    Push,                       //推挤
    Reveal,                     //揭开
    MoveIn,                     //覆盖
    Cube,                       //立方体
    SuckEffect,                 //吮吸
    OglFlip,                    //翻转
    RippleEffect,               //波纹
    PageCurl,                   //翻页
    PageUnCurl,                 //反翻页
    CameraIrisHollowOpen,       //开镜头
    CameraIrisHollowClose,      //关镜头
    CurlDown,                   //下翻页
    CurlUp,                     //上翻页
    FlipFromLeft,               //左翻转
    FlipFromRight,              //右翻转

} AnimationType;
- 获取Button的Tag值:
     UIButton *button = sender;
     AnimationType animationType = button.tag;
- 每次点击button都改变subtype的值,包括上,左,下,右
NSString *subtypeString;

    switch (_subtype) {
        case 0:
            subtypeString = kCATransitionFromLeft;
            break;
        case 1:
            subtypeString = kCATransitionFromBottom;
            break;
        case 2:
            subtypeString = kCATransitionFromRight;
            break;
        case 3:
            subtypeString = kCATransitionFromTop;
            break;
        default:
            break;
    }
    _subtype += 1;
    if (_subtype > 3) {
        _subtype = 0;
    }
- 通过switch结合上边的枚举来判断是那个按钮点击的
 switch (animationType)
 {
     //各种Case,此处代码下面会给出
 }
3.调用我们封装的运动方法,来实现动画效果
- 淡化效果
case Fade:
     [self transitionWithType:kCATransitionFade WithSubtype:subtypeString ForView:self.view];
     break;
- Push效果
case Push:
     [self transitionWithType:kCATransitionPush WithSubtype:subtypeString ForView:self.view];
     break;
效果如下:
- 揭开效果:
case Reveal:
    [self transitionWithType:kCATransitionReveal WithSubtype:subtypeString ForView:self.view];
    break;
效果如下:

- 覆盖效果:
case MoveIn:
    [self transitionWithType:kCATransitionMoveIn WithSubtype:subtypeString ForView:self.view];
    break;
效果如下:

- 立方体效果:
case Cube:
    [self transitionWithType:@"cube" WithSubtype:subtypeString ForView:self.view];
    break;
效果如下:

- 吮吸效果:
case SuckEffect:
    [self transitionWithType:@"suckEffect" WithSubtype:subtypeString ForView:self.view];
    break;
效果如下:

- 翻转效果:
case OglFlip:
    [self transitionWithType:@"oglFlip" WithSubtype:subtypeString ForView:self.view];
    break;
效果如下:
- 波纹效果:
case RippleEffect:
    [self transitionWithType:@"rippleEffect" WithSubtype:subtypeString ForView:self.view];
    break;
效果如下:

- 翻页和反翻页效果:
case PageCurl:
            [self transitionWithType:@"pageCurl" WithSubtype:subtypeString ForView:self.view];
            break;

        case PageUnCurl:
            [self transitionWithType:@"pageUnCurl" WithSubtype:subtypeString ForView:self.view];
            break;
效果如下:


- 相机打开效果:
case CameraIrisHollowOpen:
            [self transitionWithType:@"cameraIrisHollowOpen" WithSubtype:subtypeString ForView:self.view];
            break;

        case CameraIrisHollowClose:
            [self transitionWithType:@"cameraIrisHollowClose" WithSubtype:subtypeString ForView:self.view];
            break;

- 调用上面封装的第二个动画方法
case CurlDown:
            [self animationWithView:self.view WithAnimationTransition:UIViewAnimationTransitionCurlDown];
            break;

        case CurlUp:
            [self animationWithView:self.view WithAnimationTransition:UIViewAnimationTransitionCurlUp];
            break;

        case FlipFromLeft:
            [self animationWithView:self.view WithAnimationTransition:UIViewAnimationTransitionFlipFromLeft];
            break;

        case FlipFromRight:
            [self animationWithView:self.view WithAnimationTransition:UIViewAnimationTransitionFlipFromRight];
            break;